After taking some time off after the holidays, our trip to Disney, the cold weather, etc, I am FINALLY on to the next room in the house. The kitchen! I realized looking back at the original Home SWEET Home post, that my tour fell a little short and I didn't post a SINGLE photo of the kitchen. Shame on me! So, here are some befores for you {I did however remove some birdhouse border from there already and couldn't find any pictures that showed it}
This is a shot of the whole room, from the corner, beside a window.
Same corner, just looking more towards the side door.
To say this kitchen is outdated is an understatement, but it is HUGE.
From the back hall, looking towards the side door to the house. If you cant find the door, just look for the awkward exit sign {slap that on the to do list}
Since this is the door we use on a daily basis, this area doubles are our "landing station" { I have written about our Florida landing station and you can relive that here} Instead of pool toys and sunscreen, our Indiana landing station comes packed with scarves, hats, gloves, and coats.
Isabelle's school calendars, box tops, and fun projects have a home on the pin board.
We have a basket for changing a quick diaper and another holding all those aforementioned scarves and gloves.
Hats on top, along with sunglasses, keys, and a cup for loose change.
Moving on...On the opposite side of the opening to the toy room are some built in cabinets that I use as sort of a breakfast station.
All manner of baked goods make their way here {but not for long} alongside the coffee pot. Coffee, filters, creamer, mugs, toaster, and breads, are stored in the upper glass cabinets.
He man Jude ripped one of the lower doors off, but it gave me inspiration for a future project {check back for that}
Looking back into the meat of the kitchen, you will see the stove, fridge, sink, and remaining cabinetry.
There is also a laundry room behind the door next to the fridge and a nice sized built in pantry next to the table by the window.
The ceilings are super high in this room {and all rooms for that matter} and are accented by a nice picture rail across 2 walls.
I would like to remove the upper portion of the cabinetry here to draw your eye up in the room instead of chopping it in half.
So, now that you see what we are working with, here is the list of to do's for Kitchen makeover stage 1.
- Fill holes
- Prime walls and woodwork {not cabinets, for now}
- Prime water stain on ceiling
- Paint Ceiling
- Paint Walls
- Paint Trim
- Remove remaining doors on lower coffee bar cabinets
- Remove upper cabinet {hopefully}
One of my favorite things to do in my boredom is rearrange my furniture. This might also be one of my husbands biggest pet peeves about me. He likes things to always be the same and I can never make up my mind about what I want and lets be honest, its basically playing doll house with a real house and thats what all little girls dream of doing, right? About one of the only perks of being away from my hubby right now, is that I can rearrange to my hearts content :) So, here are some pics of the ever changing living room...for now ;)
This is where we were last time I checked in..
I didn't move things for a while on account of all the Christmas décor being up {which if you missed that you can look back here} but once that was taken care of, I couldn't resist!
Of course when moved furniture around I am always left with these pesky marks. Good thing I know a little trick ;)
Let an ice cube melt into the spot and then fluff the fibers with the prongs of a fork.You wont even be able to tell afterwards. Your welcome :)
The couches stayed in the same place but I moved the desk and added a shelf thanks to the charity of my friends Brecklyn and Justin.Thanks guys! {If you read my family blog See Our Sweet Life, then you have probably heard about Brecklyn before lol.}
The tv pretty much has to stay where it is since that's where the cable comes in. { I have plans to paint both the desk and this tv stand, color suggestions? Yellow? Black? Aqua?}
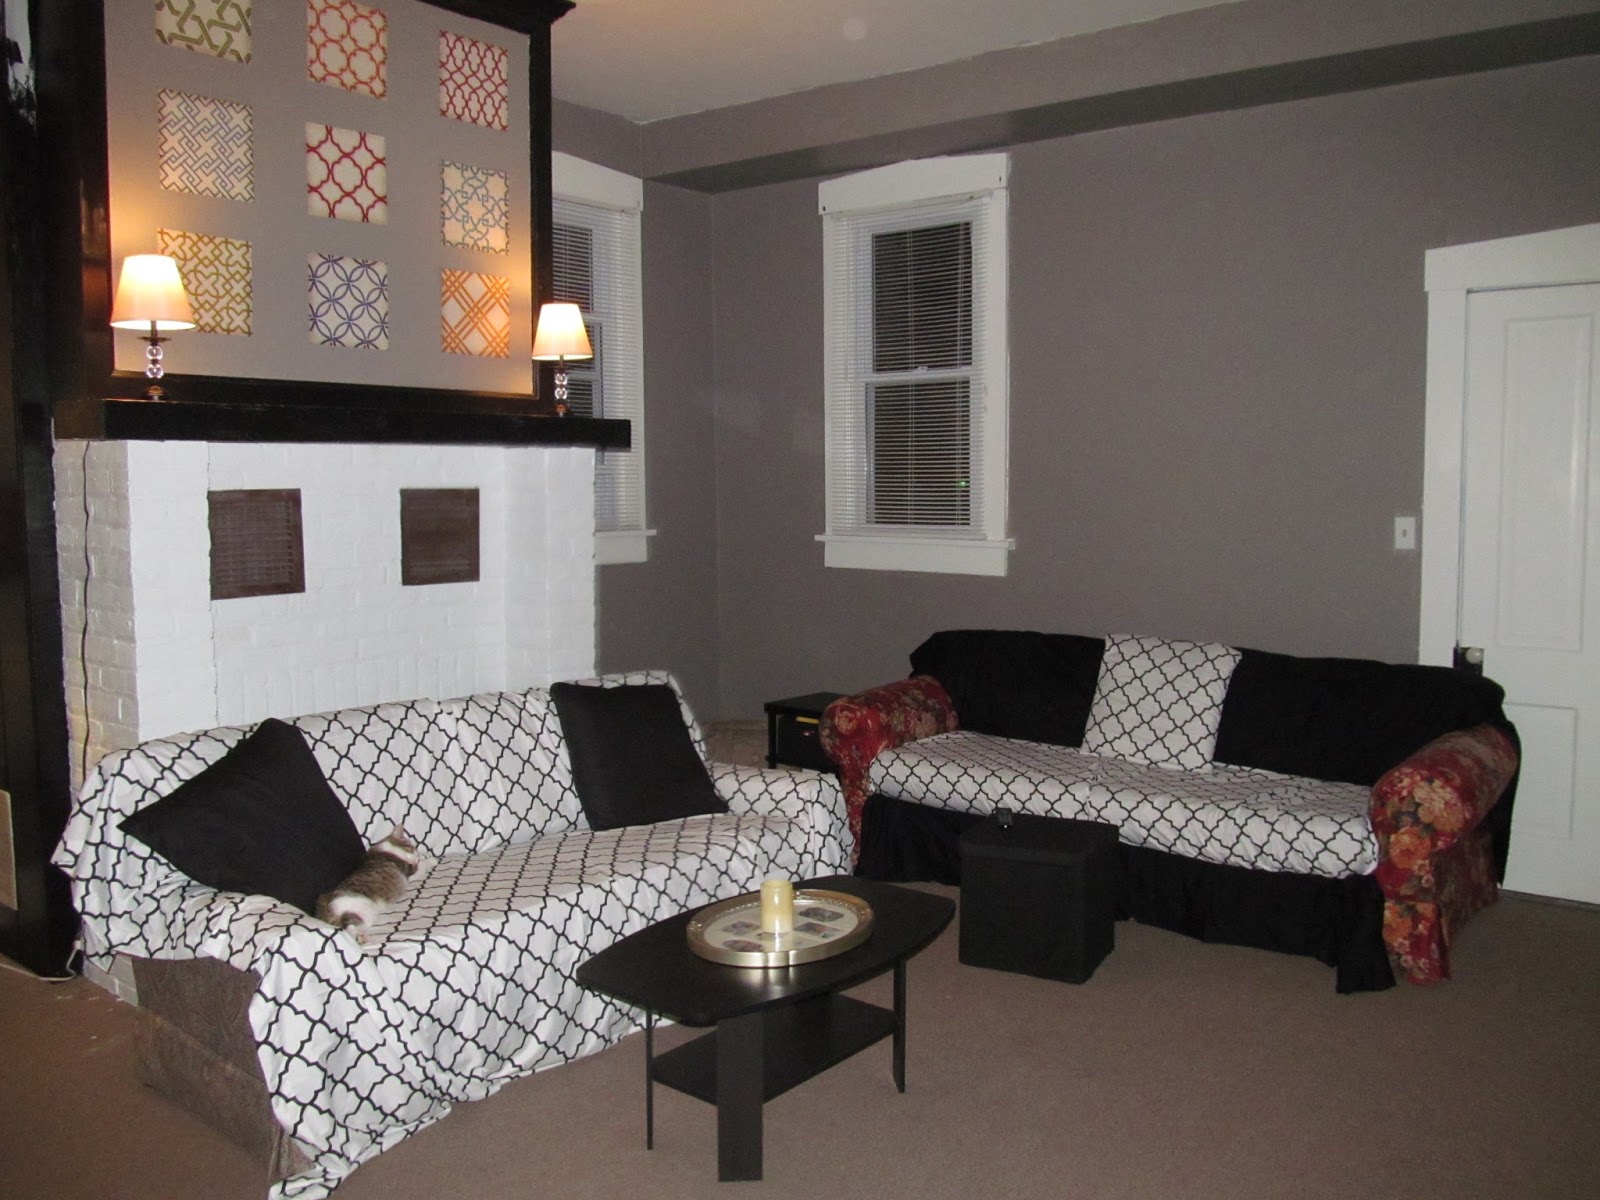
Well, that lasted a little while. Until I found a cute set of sheets that I thought would be perfect to cover the patterned unmatching couches. Which inspired me to move some things around yet again.
I left the couches again, but swapped out the iron medallion over the mantle {which was just slightly to small} for some patterned decals that I scored super cheap from LTD commodities.
I moved both lamps onto the mantle and moved the chair and sidetable/lamp under the window on the left.
Both the floor lamp/table and the lamp on the desk used to be brass. I gave them both a little revamping which I will share with you later :) I moved the desk where the chair used to be and left the shelf in the same place.
The medallion found a home above the desk for now { I have plans to use this wall for something else}
The other couch also stayed but was covered and got some company in the way of an ottoman and a side table. {Still in search of a solution for covering up the arms, ideas?}
Rocko seems to enjoy it
An this just wouldn't be a complete post without a up to date before and after. Drumroll please..............
Before
After
Still a work in progress but I am loving the journey :)